
1
dol.wa.gov
The Washington
Parent Guide
to Teen Driving
DEPARTMENT OF LICENSING
The Washington
Parent Guide
to Teen Driving

P
Parts of this guide were developed by
the Idaho Department of Education and
the State of Oregon. Permission has
been given to revise and reproduce for
Washington State. Special thanks go
to the State of Montana, and Jessica
Hartos for their contributions and input.
We provide this guide to help you
teach good driving habits. It has
information you can use to help reduce
risk. The information in this guide is
not intended to be comprehensive.
Use good judgment when you adapt
this information to different driving
situations and conditions.

welcome
to the world of teen driving
We know you want to keep your children safe. Teens are
much more at-risk than the rest of the population due to
their inexperience at handling driving situations. The State of
Washington passed intermediate licensing laws in 2001 to
keep teens safe and it’s working - the number of fatalities and
collisions have gone down more than 30%.
One of the best ways to keep teens safe is to make sure
they have had adequate instruction. Every hour of instruction
keeps them safer on the road, especially as they pass
through the later stages of intermediate licensing when you’re
not with them.
Recent research shows that parents report more driving
practice time than their teen. We know that parents mean
well, but unless you are keeping track of practice time, your
teen may not be completing all of the required hours. It
might be tempting not to keep a log or to report more driving
practice than is actually completed, but don’t give in, even if
your teen says they are ready to take their test. It’s important
to track hours because the more practice you give your teen,
the safer they are.
Did you know…?
It will take more than 15 minutes of practice-time every day
for 6 months to complete 50 hours of practice-driving.
It will take more than 30 minutes of practice time every day
for 6 months to complete 100 hours of practice driving.
Use the driving log in the center of this book to help you track
your driving time together and your teen’s progress.
Teens are sometimes so focused on getting their license,
they don’t have the restrictions fully in mind. Restrictions
include not having friends in the vehicle and not driving
between 1 am and 5 am. To help you and your teen know
i

the details and keep the restrictions handy, the last page of
this manual lists the restrictions and has a space to record
the date they end. You can cut out this page and post it on
your refrigerator.
It’s important for teens to know what will happen if they break
the intermediate license rules. With that in mind, the other
side of the page that you can cut out outlines some of the
major things that can happen and how these can affect the
driving privilege. As you already know, one of the best ways
to teach teens responsibility is to outline both the rules and
the consequences for breaking them. The cut-out may help to
reinforce these.
A study completed in Oregon in January, 2005, reviewed the
records of 16, 17, 18, and 19-year old drivers. It compared
teens who took a formal driver education course to those who
chose 100 hours of driving practice with their parents. For
teens who took an approved driver education course:
The collision rate was 11-2
1% lower.
The traffic conviction rate was 39-57%
lower.
The driver license suspension rate was 51
-53% lower.
The best teacher is a good role model. Responsible driving
is one of the most important things you can do to keep your
teen safe. We hope this guide will be valuable to both you and
your teen throughout your learning experience.
the Washington parent guide to
teen driving
ii

contents
table of
iii
Parents’ Role in the World of Teen Driving
What is the Parent’s Role in Teen Driving?. . . . . . . . . . . . . . . . . . . 1
What Parents Need to Know . . . . . . . . . . . . . . . . . . . . . . . . . . . . . 3
High-Risk Driving Conditions . . . . . . . . . . . . . . . . . . . . . . . . . . . . . 4
Supervise Your Teen Driver
Tips for Supervising Teen Driving. . . . . . . . . . . . . . . . . . . . . . . . . . 5
Use a Practice Driving Log. . . . . . . . . . . . . . . . . . . . . . . . . . . . . . . 6
Each Time You Practice:. . . . . . . . . . . . . . . . . . . . . . . . . . . . . . . . . 7
Set Family Rules and Guidelines for Driving
Use a Parent-Teen Driving Agreement. . . . . . . . . . . . . . . . . . . . . . 8
Driving Rules/Guidelines for Your Family . . . . . . . . . . . . . . . . . . . . 8
Provide a Safe, Reliable Vehicle for Your Teen . . . . . . . . . . . . . . . . 9
Impose Consequences for Violating Rules and Ignoring Guidelines 9
Before You Even Begin
Teen Driver Training Orientation . . . . . . . . . . . . . . . . . . . . . . . . . . 11
Parent Tips for Training Your Teen Driver . . . . . . . . . . . . . . . . . . . 13
Vehicle Safety Features . . . . . . . . . . . . . . . . . . . . . . . . . . . . . . . . 13
Know the Vehicle . . . . . . . . . . . . . . . . . . . . . . . . . . . . . . . . . . . . . 15
Blind Spots . . . . . . . . . . . . . . . . . . . . . . . . . . . . . . . . . . . . . . . . . . 16
An Exercise to Become Familiar with Blind Spots . . . . . . . . . . . . 17
Basic Driving Skills
Automatic or Manual Transmission?. . . . . . . . . . . . . . . . . . . . . . . 18
Steering Control . . . . . . . . . . . . . . . . . . . . . . . . . . . . . . . . . . . . . . 18
Speed Control. . . . . . . . . . . . . . . . . . . . . . . . . . . . . . . . . . . . . . . . 19
Lane Positions . . . . . . . . . . . . . . . . . . . . . . . . . . . . . . . . . . . . . . . 21
Following Time . . . . . . . . . . . . . . . . . . . . . . . . . . . . . . . . . . . . . . . 22
Searching Skills . . . . . . . . . . . . . . . . . . . . . . . . . . . . . . . . . . . . . . 23
Communication with Other Drivers. . . . . . . . . . . . . . . . . . . . . . . . 24
Use of Headlights. . . . . . . . . . . . . . . . . . . . . . . . . . . . . . . . . . . . . 24
Practice Driving Log. . . . . . . . . . . . . . . . . . . . . . . . . . . . . . . . . . 26
Step-By-Step Maneuvers
First Things First. . . . . . . . . . . . . . . . . . . . . . . . . . . . . . . . . . . . . . 38
Entering the Vehicle . . . . . . . . . . . . . . . . . . . . . . . . . . . . . . . . . . . 38
Making Adjustments . . . . . . . . . . . . . . . . . . . . . . . . . . . . . . . . . . . 39
Starting the Vehicle. . . . . . . . . . . . . . . . . . . . . . . . . . . . . . . . . . . . 40
iv
Secure the Vehicle After Driving. . . . . . . . . . . . . . . . . . . . . . . . . . 41
Backing. . . . . . . . . . . . . . . . . . . . . . . . . . . . . . . . . . . . . . . . . . . . . 41
Backing Up Straight . . . . . . . . . . . . . . . . . . . . . . . . . . . . . . . . . . . 42
Backing Turns . . . . . . . . . . . . . . . . . . . . . . . . . . . . . . . . . . . . . . . . 43
Backing into a Driveway . . . . . . . . . . . . . . . . . . . . . . . . . . . . . . . . 44
Backing Out of a Driveway . . . . . . . . . . . . . . . . . . . . . . . . . . . . . . 44
Parking . . . . . . . . . . . . . . . . . . . . . . . . . . . . . . . . . . . . . . . . . . . . . 45
Entering Angle Parking. . . . . . . . . . . . . . . . . . . . . . . . . . . . . . . . . 45
Exiting Angle Parking . . . . . . . . . . . . . . . . . . . . . . . . . . . . . . . . . . 46
Perpendicular Parking . . . . . . . . . . . . . . . . . . . . . . . . . . . . . . . . . 47
Backing into Perpendicular Parking Space. . . . . . . . . . . . . . . . . . 48
Parallel Parking. . . . . . . . . . . . . . . . . . . . . . . . . . . . . . . . . . . . . . . 49
Exiting a Parallel Parking Space. . . . . . . . . . . . . . . . . . . . . . . . . . 49
Parking on Hills. . . . . . . . . . . . . . . . . . . . . . . . . . . . . . . . . . . . . . . 50
Good Habits/Proper Procedures for Parking on Hills . . . . . . . . . . 50
Turns. . . . . . . . . . . . . . . . . . . . . . . . . . . . . . . . . . . . . . . . . . . . . . . 51
Right Turns With a Required Stop . . . . . . . . . . . . . . . . . . . . . . . . 51
Right Turns Without a Required Stop . . . . . . . . . . . . . . . . . . . . . . 52
Left Turns With a Required Stop. . . . . . . . . . . . . . . . . . . . . . . . . . 54
Left Turns Without a Required Stop . . . . . . . . . . . . . . . . . . . . . . . 54
Bicycles on the Roadway . . . . . . . . . . . . . . . . . . . . . . . . . . . . . . . 56
Complex Driving Skills
Changing Lanes . . . . . . . . . . . . . . . . . . . . . . . . . . . . . . . . . . . . . . 57
Passing. . . . . . . . . . . . . . . . . . . . . . . . . . . . . . . . . . . . . . . . . . . . . 58
Entering the Freeway . . . . . . . . . . . . . . . . . . . . . . . . . . . . . . . . . . 60
Exiting the Freeway . . . . . . . . . . . . . . . . . . . . . . . . . . . . . . . . . . . 61
Railroad Grade Crossings . . . . . . . . . . . . . . . . . . . . . . . . . . . . . . 62
School Zones . . . . . . . . . . . . . . . . . . . . . . . . . . . . . . . . . . . . . . . . 63
Crosswalks . . . . . . . . . . . . . . . . . . . . . . . . . . . . . . . . . . . . . . . . . . 64
Night Driving. . . . . . . . . . . . . . . . . . . . . . . . . . . . . . . . . . . . . . . . . 65
Skid Recovery . . . . . . . . . . . . . . . . . . . . . . . . . . . . . . . . . . . . . . . 66
Driving in Bad Weather. . . . . . . . . . . . . . . . . . . . . . . . . . . . . . . . . 66
Emergencies — How to Handle Them
Vehicle Malfunctions. . . . . . . . . . . . . . . . . . . . . . . . . . . . . . . . . . . 67
If You Have a Collision . . . . . . . . . . . . . . . . . . . . . . . . . . . . . . . . . 69
If You’re Stopped by Law Enforcement. . . . . . . . . . . . . . . . . . . . . 70
What Happens if Your Teen Messes Up?
What Happens Until Age 18? . . . . . . . . . . . . . . . . . . . . . . . . . . . . 71
Tough Penalties for First-Year Convictions . . . . . . . . . . . . . . . . . . 71
The Rules for Intermediate Licenses
What is Needed to Qualify for a License . . . . . . . . . . . . . . . . . . . 73
After Your Teen Gets a License. . . . . . . . . . . . . . . . . . . . . . . . . . . 73

P
What is the Parent’s Role
in Teen Driving?
Knowing the intermediate license laws
Knowing all you can about teen driving
Supervising your teen’s driving
Establishing family driving rules and limits
Fulfilling the parent’s role in teen driving is very important.
Being a good role model will allow you to:
Know you are increasing your teen’s ability to drive safely.
Know first hand how your teenager is progressing toward
becoming a better driver.
Know where your teen is and that she or he is not taking
unnecessary risks.
Talk to your teen about substance abuse.
Washington’s Intermediate License law increases the safety
of teen drivers by giving them more time to gain valuable
driving experience before becoming fully licensed. Under this
law your teen will get a “restricted” license.
Instructi
on Permit
Your teen:
Must be at least 15 and enrolled in a traffic safety
education course.
Must pass a written test if 15-1/2 and not enrolled in a
traffic safety education course.
May not drive unless another individual that has a valid
license and at least five years of driving experience
supervises while sitting beside the driver.
•
•
•
•
•
•
•
•
•
•
•
in the world of teen driving
parents’ role
in the world of teen driving
1

Intermediate License
Your teen:
Must be at least 16.
Must pass our driver licensing exam.
Must hold an instruction permit for at least 6 months before
applying for an intermediate license.
Must complete at least 50 hours of supervised driving, and
10 of these hours must happen at night.
For the first 6 months cannot carry passengers younger
than 20 (other than immediate family).
For the second 6 months cannot carry more than 3
passengers younger than 20 (other than immediate family).
For the first year, cannot drive between 1 am and 5 am
unless accompanied by a parent, guardian, or a licensed
driver who is at least 25 years old.
Restrictions are automatically lifted after 1 year if your teen:
Has not been involved in an auto collision
Has not been convicted of or found to have committed
a rules-of-the-road traffic offense or violated any of the
intermediate license restrictions.
On your teen’s 18th birthday, the license automatically
becomes a basic driver license, without the intermediate
restrictions. There is no need to visit a driver licensing office
to change it.
•
•
•
•
•
•
•
•
•
2

What Parents Need to Know
Driving Risks
Driving can be a dangerous activity for anyone; however, it
is more dangerous for young drivers. Novice teen drivers are
involved in collisions more than any other age group. These
are some of the reasons:
Young
age/Lack of maturity: Teenagers can make more
errors in judgment than those in other age groups. Be
aware that your teen is likely to drive differently and to take
more risks when you are not in the vehicle.
Brai
n development: Teens should be the world’s best
drivers. Their muscles are well toned, their reaction time is
quick, and their eye-hand coordination is at a peak. Yet
colli
sions kill more teens than any other cause — a
problem, some researchers believe, that is rooted in the
adolescent brain. A National Institutes of Health study
suggests that the region of the brain that inhibits risky
behavior is not fully formed until age 25.
Ri
sky driving behaviors: Teenagers may engage in risky
driving behaviors. These include speeding, running red and
yellow lights, running stop signs, tailgating, weaving in and
out of traffic, not keeping a safe distance for merging or
changing lanes, misjudging gaps in traffic, and misjudging
the capability of their vehicle.
Di
stractions: Any new or inexperienced driver is
challenged when faced with distractions while driving.
Music, cell phones, pets, and passengers should be left at
home while your teen is learning to drive.
•
•
•
•
3
Driving inexperience: Teenagers lack driving experience.
It takes a
lot of practice to be able to safely maneuver in
everyday situations and unexpected circumstances. Teens
show the greatest improvement within the first year and
1,000 miles of driving. They continue to improve through
their first 5,000 miles of driving.
High-Risk Driving Conditions
Driving under the influence of alcohol or drugs:
Drinking any — yes, any — amount of alcohol is impairing.
Not only is the use of alcohol and illicit drugs illegal, the
combination of alcohol or drugs and driving can be deadly.
Hi
gh speeds: For teen drivers (especially males), most
severe collisions occur at high speeds. Collision risk,
severity, and force increase as speed increases.
Passeng
ers: For teen drivers, as the number of
passengers increases, teen collisions increase. Driving is a
“new skill” for teens, and they need to pay close attention.
Teen passengers can be a major distraction. They may
encourage friends to speed, to show off, or to pay too little
attention to driving.
Ni
ghttime driving: For teen drivers, the most severe
collisions occur at night and on weekends. Night driving is
a challenge for all drivers, and teen drivers do not have the
experience to anticipate and react to nighttime conditions
when visibility is poor. Make sure your teen gets plenty of
practice driving with you at night and in all kinds of weather.
Be aware that teenagers driving at night usually lack adult
supervision, carry passengers, and drive at high speeds.
All of these multiply risk.
Safety
belt non-use: Teen drivers and passengers use
safety belts less than people in other age groups do. Safety
belts are important because they keep people inside the
vehicle where they are the safest.
•
•
•
•
•
•
4

Driver education is the beginning of the process of
learning to drive. Teens also need many hours
of practice to become safer drivers.
Tips for Supervising Teen Driving
Practice, practice, practice! Practice as much as possible,
even after your teen gets a license.
Who: Practice with only you and your teen in the vehicle.
Other people or pets can distract both of you and can also
add stress. Stay calm and focused. Mistakes are part of
learning, and even though practice driving is serious, it
should be interesting and engaging.
What: You should practice the same driving skills that your
teen is learning. Begin with basic skills such as turning,
parking, and backing up. Then, practice more complex
skills such as changing lanes and merging.
When: In the beginning, practice during daylight hours
with good weather. As your teen’s skills improve, gradually
expose them to different roads, weather conditions, and
hours of the day.
Where: In the beginning, practice in safe, low-risk driving
areas. Start in empty parking lots or on remote roads. As
your teen’s skills improve, progress to quiet neighborhood
streets and later to busier roads and highways.
Wh
y: Lear
ning to drive is a complex and ongoing process.
New drivers need a lot of practice to handle daily driving
hazards and unexpected situations. Teens will show the
greatest improvement in the first 1,000 to 5,000 miles of
driving. Both parents and teens need to be dedicated and
responsible to make the most of this time.
•
•
•
•
•
S
supervise
your teen driver
5

The leading cause of death among 15-24 year olds
in Washington is due to motor vehicle crashes
Use a Practice Driving Log
Use the driving log in the center of this book to track your
teen’s practice driving and progress.
Dri
ver Education
Formal driver education may be the most important class
teenagers take. Driver education promotes critical lifelong
skills, proper safety belt use, alcohol- and drug-free driving,
respect, courtesy, cooperation, and healthy behaviors and
choices. The Washington driver training program is saving
lives, reducing injuries, and dramatically reducing the
negative impacts of teen driving by making our teens better
and safer drivers.
Parents, educators, state officials, students, and community
members need to create powerful partnerships to support
teaching and learning in every community. We need to
guarantee that young drivers are taught preventive behaviors
to manage risk. Since driving is a life-long skill, it is important
to establish good habits early. Ask if your local school offers
a driver education course. If not, there are driver training
schools throughout the state. When your teen applies for a
license, a Washington Traffic Safety Education Completion
Certificate satisfies 30 hours of classroom and 6 hours
of behind-the-wheel training requirements. Your teen will
still need to complete 50 hours of practice driving, and 10
of these hours must happen at night, with you or another
licensed driver with at least 5 years of driving experience.
6

Each Time You Practice:
Be in the “practicing mood.” Practice when both of you
are in good moods, are well rested, and have enough time.
Adjust
the mirrors, safety belts, seats, and steering
wheel position before starting the vehicle.
Always wear your safety belts.
Come to a complete stop
at stop signs and at red lights.
Before moving from a stop, look left, then front (straight
ahead), and then right.
Keep
your eyes moving. Use your mirrors to check
around and behind the vehicle every 6-8 seconds.
Keep
at least a 2-4 second space between your vehicle
and others in traffic flow. Try to stay centered in your lane of
travel.
Av
oid the “No-Zone” with trucks or buses. This is about
15 feet on all sides of the truck. If you cannot see truck
drivers in their
mirrors, they cannot
see you either.
Speed increases
braking distance.
Doubling your speed
will quadruple your
braking distance. The
faster you’re going
the longer it takes to
stop.
Veh
icle weight increases braking distance. Doubling
your vehicle weight will double your braking distance. If you
are driving a large vehicle or towing a trailer, it takes longer
to stop.
•
•
•
•
•
•
•
•
•
•
NO-ZONE
NO-ZONE
NO-ZONE
NO-ZONE
7

Washington law sets requirements for teen driving, but families
need to establish further rules and limits for their teen drivers.
Make sure that family rules are very clear from the beginning.
Talk to your teen about driving every chance you get.
Use a Parent-Teen Driving Agreement
Use a parent-teen driving agreement to establish rules and
guidelines for your teen driver, and to make sure everyone is
clear about them! A sample agreement can be found on our
website at dol.wa.gov.
Driving Rules/Guidelines for Your Family
Require safety belt use: This applies to your teen and all
passengers at all times.
Proh
ibit alcohol and/or drug use: This applies to your
teen as the driver of any vehicle.
Proh
ibit riding with someone who has used alcohol
or drugs: This applies to your teen as the passenger in
another vehicle.
Requi
re compliance with speed limits: Stress that this
applies to all roads at all times because collisions at higher
speeds kill.
Proh
ibit distractions while driving: No cell phone use,
eating, drinking, pets, or changing radio or CDs while
driving.
•
•
•
•
•
S
set family rules
and guidelines for driving
8
Limit teen passengers: According to Washington’s laws,
with an intermediate license, your teen cannot drive with
non-family passengers under age 20 for the first 6 months,
and can drive with no more than 3 non-family passengers
under age 20 for the second 6 months. Limiting
passengers reduces distractions and the temptation of
risky behavior.
L
i
mit unsupervised night driving: According to
Washington’s laws, your teen cannot drive between 1 am
and 5 am for the first year unless they are supervised.
Statistics show that teens have a higher collision rate
during these hours. Consider setting an earlier driving
curfew, especially on the weekends, for the first 6 months
your teen drives unsupervised.
Requi
re a full report: Ask for information about each trip
before your teen leaves, including where they are going,
with whom, and when they will return so that you know
where they are.
Provide a Safe, Reliable Vehicle for Your Teen
Mid- to full-size sedans and station wagons with smaller
engines and airbags are safest for teen drivers.
Under certain conditions, small trucks and SUVs may be
more prone to roll-overs than other types of vehicles.
High-performance cars may encourage teens to drive
beyond their experience level.
Impose Consequences for Violating Rules
and Ignoring Guidelines
The consequence for violating rules or ignoring guidelines
should be the loss of the driving privilege: for a day,
weekend, week, month, etc., depending on the violation.
Consequences other than the loss of the driving pr
ivilege
won’t send these messages as effectively: “You must be a
responsible driver” and “I am serious about your following
the rules and limits for driving.”
Requiring your teen to complete additional supervised
practice is an option worth considering.
•
•
•
•
•
•
•
•
9
Make consequences known: Set consequences for
violations before they occur so that your teen knows what to
expect. The following are common violations:
Getting a speeding ticket.
Coming home after curfew.
Lying about whereabouts.
Violating passenger restrictions.
•
•
•
•
10

B
before
you even begin
In 2005 Washington teens were twice as likely
as other drivers to be involved in a collision.
So, before you even get into the vehicle, make sure
that both you and your teen understand the basics.
Teen Driver Training Orientation
Before you begin training, make sure you know common teen
driving errors and ways you can help your teen be a better
driver.
Top
10 Driving Errors
Inattention to the path of travel
Driving five or more miles per hour too fast for conditions
Driving too fast through a curve
Inadequate search or inattention at an intersection and
failing to yield to cross traffic
Improper evasive action — quick turn not done correctly
Failure to look far enough ahead
Failure to see action developing at the side of the roadway
Following too closely
Failure to yield right-of-way
Being distracted
•
•
•
•
•
•
•
•
•
•
11
Aggressive Driving
Drivers who routinely speed, run red lights and stop signs,
tailgate, and otherwise disregard the safety of other motorists
are turning streets and highways into high-risk areas.
Aggressive driving can easily escalate into road rage. We’re
all too familiar with stories of motorists who’ve killed or injured
other drivers for seemingly trivial reasons.
When i
s it Aggressive Driving?
The following attitudes and behaviors indicate that problem
driving behaviors are related to aggression rather than
inexperience:
Constant rushing, lane jumping, and the need to “get
ahead.”
Ignoring road signs and regulations.
Constantly ridiculing and criticizing other drivers.
Denying entry into your lane or preventing passing.
Speeding past another vehicle, revving engine.
Tailgating so others go faster or get out of your way.
Honking, yelling, or making visible, insulting gestures.
When
Y
ou Are Confronted by Aggressive Drivers:
First and foremost, make every attempt to get out of their
way.
Put your pride in the back seat. Do not challenge them by
speeding up or attempting to “hold-your-own” in your travel
lane.
Avoid eye contact.
Ignore gestures and refuse to return them.
Report aggressive drivers to the proper authorities by
giving a vehicle description, license number, location, and
if possible, the direction of travel.
If you have a cell phone and can use it safely, call 911.
•
•
•
•
•
•
•
•
•
•
•
•
•
12

Parent Tips for Training Your Teen Driver
Set a good example
You should always model correct, legal driving behavior
for your teen driver. Also, make sure you and your teen are
familiar with all controls and safety devices in each of the
family vehicles.
Expect
that your teen will make mistakes
Making mistakes is part of learning so be positive and calm.
Try to separate physical errors (like turning the wheel too
soon) from mental errors (like not detecting a problem) and
coach your teen accordingly. Always praise correct driving
behaviors.
Gi
ve directions clearly, calmly, and well in advance
Explain why and how to do things in a soft, steady voice.
Do
not assume your teenager knows what you want them
to do.
Stay
focused and ready
Remember, you are the responsible driver of the car so
constantly scan the driving scene and be ready to react to
any driving situation.
•
Make sure that you verbally guide your teen through
situations well in advance of trouble
•
If necessary, be ready to react to any driving situation and
assist with verbal or physical steering guidance..
Vehicle Safety Features
It is important that you and your teen understand the safety
features in each of your vehicles. Tog
ether, read your
vehicle manuals for information about, and the proper
use of, vehicle safety features.
Safety Belts
In 2005 and 2006, Washington averaged 471 traffic fatalities
yearly. More than 1 in 3 victims were not wearing safety belts.
Washington law requires children under 8 years old to be in
a child safety or booster seat unless they are 4´9˝ or taller.
Children under age 13 must ride in the back seat where it is
practical to do so. Air bags were designed to work for adult-
sized people, and they can be lethal to children.
13
Each of the following can significantly reduce injuries in the
event of a collision. Practi
ce each of these with your teen:
Read manufacturer’s instructions for proper use of safety
belts and car seats.
Wear safety belts.
Have children under age 13 sit in the back seat.
Place children correctly in proper child restraints.
A
i
r bags
Airbags and safety belts are designed to be used together. Air
bags and safety belts keep you in the safest positions during
a collision. Depending on your vehicle, you may have front or
side air bags or both.
Air bags can deploy at speeds of up to 200 mph and
temperatures of almost 500 degrees. The deployment and
deflation happens faster than the eye can see. Front and side
impacts will activate air bags.
Proper Procedures for Use
Read vehicle manuals to know where airbags are located
and when and how they deploy.
Sit at least 10 inches from the steering wheel.
Does
your Vehicle have Antilock Brake Systems (ABS)?
Most vehicles made in the last 10 years have antilock brake
systems. ABS is designed to help a driver maintain control
during emergency braking situations by keeping the tires
from locking up. However, it does not make a vehicle stop
more quickly. In fact, the rolling traction may produce longer
stopping distances on some dry or limited traction surfaces
such as loose gravel or fresh snow.
Some vehicles are equipped with ABS on all 4 wheels.
Others, such as light pickup trucks, only have ABS on the
rear wheels. Check your vehicle manuals to see if you have
ABS and if so, on which wheels.
•
•
•
•
•
•
14
How Do You Use ABS?
Vehicles with ABS require the foot to remain firmly on the
brake pedal when braking hard. This allows the system to
automatically pump the brakes faster than any person could.
The system usually activates at speeds above 10 mph.
Wi
th ABS on all 4 wheels, do not pump the brakes. Keep
firm pressure on the brake, and if needed, steer away from
the hazard using a minimum amount of steering.
Wi
th ABS on the rear wheels only, the front wheels can
lock up. Pump the brakes to avoid lock-up.
Know the Vehicle
You and your teen need to be familiar with the vehicle
controls and should be able to make certain that the vehicle
is safe to operate.
Veh
icle Controls
In each of your vehicles, have your teen practice and then
demonstrate the ability to operate each of the following
without looking at the controls:
Transmission
Turn signals
Headlights
–
low and high beams
Climate controls
Defrost –
front and back
Door locks
Window controls
Par
king brake – set and release levers
Brake and gas pedals
•
•
•
•
•
•
•
•
•
•
•
15

Vehicle Readiness
In each of your vehicles, have your teen practice and then
demonstrate the ability to make certain that the vehicle is
safe to operate. Check that the:
Windows and headlights are clear
Tires are properly inflated
Mechanical condition has been checked regularly
Loose objects get secured in the trunk
Parking brake works
Signal lights and brake lights work
Blind Spots
Coach your teen to be aware of blind spots and regularly
scan them.
They should:
1. Check to the rear with the inside mirror
.
2. Check to the sides with the side-view mirrors.
3. Make a blind spot check in the area slightly beyond the
driver’s peripheral field of vision.
4. Look out of the front side windows
, not the rear side
windows, when checking the mirror blind spot areas.
New drivers tend to move the steering wheel in the direction
they move their head. Watch for this and correct if necessary.
•
•
•
•
•
•
16

An Exercise to Become Familiar with Blind Spots
The following exercise shows the area around the vehicle the
driver cannot see:
While your teen is sitting in the driver’s seat with the engine
off, get out of the vehicle and stand close to the front
bumper facing the driver.
Begin taking steps backward and have your teen tap the
horn when he or she can see your feet.
Place a cone or cup in that spot. This is the pavement area
in front of the vehicle that cannot be seen when looking out
of the windshield.
Ask the driver to use the inside mirror and/or to look over
the right shoulder, and repeat this process to the rear of
the vehicle.
Walk backwards from the passenger doors on the left and
right sides of the vehicle and place cups or cones to mark
the side areas visible to the driver.
Have your teen measure these distances and record them.
•
•
•
•
•
•
17

18
B
The basic driving skills in this section are the cornerstone of
safe and responsible driving. Make sure your teen learns,
practices, and can demonstrate these basic driving skills.
Automatic or Manual Transmission?
If possible, new drivers should first learn the basic controls in
a vehicle with automatic transmission and then learn to drive
a standard shift vehicle.
Steering Control
Modern vehicles require very little steering to turn. Look at
the steering wheel as a clock face and place your left hand
between 8 and 9 o’clock and right hand between 3 and
4 o’clock. These are the desired hand positions
that help keep you from turning the wheel
too sharply.
To reduce forearm and hand injuries,
hands should be placed on the lower
basic
driving skills

19
half of the steering wheel, with knuckles on the outside and
thumbs stretched along the rim of the steering wheel.
Make sure your teen learns, practices, and can demonstrate
the following three steering techniques:
Pull-Push
Steering
Use pull-push steering for most turning maneuvers. Put
your hands in the 8 and 4 o’clock positions. Pull down with
one hand and push up with the other. This results in smooth
steering and reduces the potential for too much steering,
which can lead to loss of control. Keep the hands and thumbs
on the outside of the wheel.
Hand-Over-Hand
Steering
Use hand-over-hand steering when steering movements are
critical. Use it when parking, making sharp right turns, and
correcting a skid. Use quick movements when beginning
the maneuver, and then use slow smooth movements when
straightening the wheel. Steering errors are directly related to
vision errors.
One-Hand
Steering
Use one-hand steering for backing maneuvers that do not
require full left or right turns, or when operating vehicle
controls for information, safety, or comfort.
Speed Control
Speed control techniques are used to make smooth starts,
stops, and turns. These improve fuel efficiency and personal
comfort. These keep the vehicle balanced, increasing vehicle
20
control and decreasing risk to yourself and others. Cruise
control is not recommended for the beginning driver.
Make sure your teen learns, practices, and can demonstrate
the following acceleration and braking techniques:
Li
ght Acceleration
Light acceleration is achieved by putting light pressure on the
gas pedal. Use it to make smooth starts and to begin turns
that require a stop.
Progressive Acceleration
Progressive acceleration is achieved by steadily increasing
pressure on the gas pedal.
Use it to get your speed up to the
limit. Continue to apply the gas until you have reached your
desired speed, then use steady, even pressure to keep it.
Cover Brake
Cover braking is achieved by placing the ball of your right
foot so that it “hovers” over the brake pedal. Use it when you
anticipate braking.
Controlled
Brake
Controlled braking is achieved by applying firm, steady, and
even pressure on the brake pedal. Use it in non-emergency
situations. Apply the brake to the point of resistance, then use
steady, even pressure.
Tra
il Brake
Trail braking is achieved by slightly decreasing pressure on
the brake pedal. Use it during the last two seconds of a stop
in order to avoid any jerky sensations, to back up, to inch
forward, to drive at a walking pace, and to begin a moving
turn.
Threshold
Brake
Threshold braking is achieved by applying maximum force
to the brake pedal without locking the wheels. Use it in
emergency situations.

21
Lane Positions
Lane positions refer to where
your vehicle is in the lane (it does
not refer to changing lanes).
Lane positions are used to
communicate your intentions to
other drivers and position your
vehicle for a driving maneuver.
Make sure your teen learns,
practices, and can demonstrate the
following three lane positions:
Lane Position 1
Lane position 1 is in the center of
the lane. This position allows for
the best separation and distance
from obstacles (such as vehicles,
curbs, and so on) to the right and
left.
Use lane position 1 for normal
driving conditions if you have no
plan to change driving maneuvers.
Lane
Position 2
Lane position 2 is the left side of
the lane. This position allows for
the best separation from obstacles
on the right and helps to improve
your li
ne of sight.
Use lane position 2 for left turns
and parking on the left.
Lane
Position 3
Lane position 3 is the right side of
the lane. This position allows for
the best separation from obstacles
on the left and helps to improve
your li
ne of sight.
Use lane position 3 for parking on
the right.

22
Following Time
Following time is important
for many reasons. You need
enough distance between
you and the vehicle in front
of you to have time to react
in an emergency.
Make sure your teenager
learns, practices, and can
demonstrate the ability to
judge
speed and distance by
using following time.
Determine Following Time
To determine following time,
watch as the vehicle in front of
you passes a stationary object,
such as a road sign. Then, start
counting “one-one-thousand,
two-one-thousand, three-one-
thousand, four-one-thousand,”
until you reach the same object.
“One-one-thousand” is about one
second.
Mai
ntain 2-4 Seconds of
Following Time
Follow at 2 or more seconds when traveling at speeds
under 30 mph.
Follow at 4 or more seconds when traveling:
At speeds over 30 mph
In congested traffic
In poor weather conditions
Behind a motorcycle, truck, or bus
•
•
•
•
Line of sight: what you can
see in any area you are looking.
If you are going forward it is the
area you can see in the front of
the vehicle. If you are backing it is
the area you see to the rear.
Li
ne of sight obstacles:
anything that restricts your view
and the ability to gather accurate
information. Examples include
curves in the road, hill crests,
bushes, signs, parked vehicles,
large vehicles, and inclement
weather such as fog and rain.
Definitions
23
Make Speed and Space Adjustments
Anytime the driver in front of you reduces speed, adjust
your following time so you can see at least 12-15 seconds
ahead.
When traffic or environmental conditions warrant, increase
following time.
Change position within the lane to increase line of sight.
Searching Skills
A common cause of poor driving and collisions is failing to
see the problem. Make sure your teen learns, practices,
and can demonstrate searching skills including: searching
intersections, and reading signs, signals, markings, and
the instrument panel. One-third of all collisions happen at
intersections.
See
a Clear Path
Before you step on the gas, always choose your path
of
travel and be sure that it is clear before moving the vehicle in
that direction.
Turn
Your Head
Before turning the steering wheel, turn your head in the
direction you intend to travel. When you look to see what is
in your path of travel before you move the vehicle in that
direction, there should be no surprises and no need for quick,
unplanned maneuvers, such as slamming on your brakes or
making sudden lane changes.
Check
Your Blind Spot
Do a chin-to-shoulder turn of your head before you pull into
traffic, or change lanes.
Do
a 360 Degree Search
Physically turn your head and body to look all the way around
your vehicle before you move in reverse or parallel park.
•
•
•

24
Search Area for Potential
Problems
Look for any changes or
obstacles. Search 20-30
seconds ahead of the vehicle
to gather information about
your path
of travel. Search
12-15 seconds ahead of the
vehicle to plan your path
of
travel and keep 2-4 seconds
following time.
Check
the Rearview Mirror
Check the rearview mirror after
seeing a change to conditions
ahead of you, before and after
braking, while stopped in traffic,
before and after turning, and
before and after changing lanes.
Communication with Other Drivers
Always communicate your intentions to other drivers. Make
sure your teen knows the communication options and when
to use them.
Turn
signals: Use turn signals to communicate in which
direction you plan to travel.
Lane
positions: Use lane positions to communicate your
plans to change driving maneuvers.
Headli
ghts: Use headlights to be more visible to others.
Horn: Use the horn whenever it can prevent a collision.
Do not use it to encourage someone to drive faster or get
out of your way, to greet friends, or around blind pedestrians,
bicyclists, or when approaching horses.
Blind spot: the area that is not
visible until you turn your head
and look.
Path
of travel: the area you
want the vehicle to go to.
Path
of travel obstacles:
anything that interferes with your
vehicle going where you want it to
go. Examples include stop signs,
speed bumps, yield signs, red or
yellow traffic lights, pedestrians,
motorcycles, bicycles, animals,
and vehicles to the front, rear,
and side.
Definitions

25
Use of Headlights
Washington law requires headlights to be on from 1/2 hour
after sunset until a 1/2 hour before sunrise. You must also use
headlights any time conditions make it difficult to see other
people or vehicles.
Low
Beam Headlights
Use low beam headlights when traveling:
At all times if possible
During the day, especially at dawn or dusk
On heavily traveled roads with traffic going in both
directions
At night in well-lit areas
In fog, rain, snow, or mist
When following 300 feet or less behind another vehicle
H
i
gh Beam Headlights
Use high beam headlights when traveling at night in dimly lit
areas when there are no oncoming vehicles.
Swi
tch From High to Low Beams
Switch from high to low beams when a vehicle approaches
you in the opposite direction at night. Washington law
requires you to dim your high beams whenever an oncoming
vehicle is within 500 feet.
If the other driver fails to switch to low beams, you need to
slow down, use lane
position 3, and move your eyes to the
right edge of the road until the vehicle passes. Do
not look
into oncoming headlights or flash high beam lights at
others. Headlight glare can temporarily blind you.
•
•
•
•
•
•
Lane position 3: the right
side of the lane.
Definition

Practice Driving Log
Use this log to track your teen’s behind-the-wheel practice
and progress.
Time Cumulative Driver’s Adult’s
Date Session topic (hrs/min) hours initials initials

Practice Driving Log
Use this log to track your teen’s behind-the-wheel practice
and progress.
Time Cumulative Driver’s Adult’s
Date Session topic (hrs/min) hours initials initials

Practice Driving Log
Use this log to track your teen’s behind-the-wheel practice
and progress.
Time Cumulative Driver’s Adult’s
Date Session topic (hrs/min) hours initials initials

Practice Driving Log
Use this log to track your teen’s behind-the-wheel practice
and progress.
Time Cumulative Driver’s Adult’s
Date Session topic (hrs/min) hours initials initials

Practice Driving Log
Use this log to track your teen’s behind-the-wheel practice
and progress.
Time Cumulative Driver’s Adult’s
Date Session topic (hrs/min) hours initials initials

Practice Driving Log
Use this log to track your teen’s behind-the-wheel practice
and progress.
Time Cumulative Driver’s Adult’s
Date Session topic (hrs/min) hours initials initials

Practice Driving Log
Use this log to track your teen’s behind-the-wheel practice
and progress.
Time Cumulative Driver’s Adult’s
Date Session topic (hrs/min) hours initials initials

Practice Driving Log
Use this log to track your teen’s behind-the-wheel practice
and progress.
Time Cumulative Driver’s Adult’s
Date Session topic (hrs/min) hours initials initials

Practice Driving Log
Use this log to track your teen’s behind-the-wheel practice
and progress.
Time Cumulative Driver’s Adult’s
Date Session topic (hrs/min) hours initials initials

Practice Driving Log
Use this log to track your teen’s behind-the-wheel practice
and progress.
Time Cumulative Driver’s Adult’s
Date Session topic (hrs/min) hours initials initials

Practice Driving Log
Use this log to track your teen’s behind-the-wheel practice
and progress.
Time Cumulative Driver’s Adult’s
Date Session topic (hrs/min) hours initials initials

Practice Driving Log
Use this log to track your teen’s behind-the-wheel practice
and progress.
Time Cumulative Driver’s Adult’s
Date Session topic (hrs/min) hours initials initials

38
step-by-step
maneuvers
The step-by-step maneuvers in this section
are similar to those taught in formal driver
education classes in Washington.
First Things First
It is important to start with the proper procedures for entering
the vehicle, making adjustments, starting the vehicle, and
securing the vehicle. Make sure your teen learns, practices,
and can demonstrate these procedures before you begin
practice driving.
Entering the Vehicle
Be Well Rested and Alert
Never drive a vehicle when you are tired or sleepy,
emotionally upset, or under the influence of alcohol or drugs
(including prescription and over-the-counter medicines).
Have
Key In Hand
When you know you are going to your vehicle, have your
key out in your hand. For your personal safety, never search
through your clothes or purse for your keys at your vehicle.
Spend as little time as possible trying to open your vehicle.
39
Approach with Awareness
As you approach your vehicle, check around it. Then, look
inside to ensure no one has entered your vehicle and is
waiting for you. You should park in well-lit areas away from
places where someone could be hiding (bushes, vans, and so
on). Your personal safety could be at risk!
Lock
All Doors
The moment you enter your vehicle, lock all doors before you
insert the key into the ignition. Someone can easily jump into
an unlocked vehicle.
Insert the key into the ignition but do not start it yet!
Making Adjustments
Adjust Seat Position
1. Place the seat so that your torso is at least 10 inches from
the steering wheel, and your arms are bent less than 90
degrees at the elbow.
2. Put the ball of your r
ight foot on the brake pedal. From your
foot position, make sure you have full range of motion in
your ankle, can fully depress the brake without your heel
coming off the floor, and can pivot on your heel to put the
ball of your foot on the gas pedal.
3. Make adjustments for best vehicle control and personal
comfort.
Adjust
Safety Belts
Put the seat back up straight.
Sit up straight with your hips and back against the seat.
Adjust the lap portion of the seat belt low across your hips
and pelvis
–
never across your stomach.
Adjust the shoulder portion across your chest and
collarbone –
never across the front of your neck or face,
behind your back, or under your arm.
Make sure the lap and shoulder belts are snug.
•
•
•
•
•

40
Adjust Wheel Tilt
If you have an adjustable steering wheel, tilt it down so
that the top of the wheel is no higher than the top of your
shoulders.
Adjust
Head Restraint
To best protect you from whiplash injuries, you should adjust
the head restraint so that the top is no higher than the top of
your ears.
Adjust
the Mirrors
This technique significantly reduces the size of typical
blind spots. This setting is great for eliminating headlight
glare too!
To adjust the driver-side mirror, place your head against
the driver’s side window and adjust the mirror out until you
can just see down the left side of your vehicle.
To
adjust the passenger-side mirror, lean your head to
the right and in line with the inside rearview mirror. Then
adjust the right outside mirror out until you can just see
down the right side of the vehicle.
To
adjust the rearview mirror sit straight up with your
hips and back against the seat, and adjust to get the best
view out the bac
k window.
Note: Mirrors do not
completely eliminate bl
ind
spots. Always do a chin-to-
shoulder turn of your head to
check blind spots
before ever
making a lateral maneuver.
Starting the Vehicle
1. Make sure the transmission is in “PARK” and the parking
brake is set.
2. Place your r
ight foot on the brake and hold it down.
3. Turn the key halfway to the “ON” position and allow the
onboard computer to boot up.
4. Check gauges and w
arning lights.
•
•
•
Blind spot: the area that is not
visible until you turn your head
and look.
Definition
41
5. Then turn the key the rest of the way to the “START”
position and release immediately.
6. Keep y
our headlights on when necessary to be visible to
other drivers.
7. Tur
n on other necessary accessories – climate control,
wipers, and so on.
8. Before enter
ing traffic, release the parking brake and
signal. Check mirrors, look over your shoulder to check
your blind spot and go when clear.
Secure the Vehicle After Driving
1. Place your right foot on the brake and hold it down.
2. Set the parking brake.
3. Shift the transmission to “PARK.”
4. Turn off all accessories – lights, wipers, climate control,
and so on.
5. Turn off the vehicle and remove your key from the ignition.
Backing
Backing increases the risk of a collision because it is more
difficult to see obstacles behind you. Backing also requires
space to maneuver because your back tires do not turn.
When
given the choice, position your vehicle so you can
pull forward instead.
Make sure your teen learns, practices, and can
demonstrate proper backing procedures.
Common Errors
Improper body position
Speed is too fast
Fails to check that the path of travel is clear
Fails to look back during the maneuver until the vehicle is
completel
y
stopped
Steers incorrectly
•
•
•
•
•

42
Backing Up Straight
1. Put your right foot firmly on the brake
pedal.
2. Shift to “REVERSE”
and release the
parking brake.
3. D
o a 360 degree search to make sure
it is all
clear!
4. Yield to all pedestrians and vehicles.
5. Hold the steering wheel at the 12
o’cloc
k position.
6. Twist y
our body and look over your
right shoulder continuously while
backing with occasional side to front
glances.
7. Tra
il brake (do not accelerate using
the gas pedal) at a walking pace
or even slower when you are near
obstacles, such as vehicles and
pedestrians.
Note: You should never back up long
distances on common roadwa
ys – forward
movement is the law!

43
Backing Turns
1. Put one hand at the
12 o’clock position and
turn your head in the
direction you intend
the rear of the vehicle
to travel.
When
turning the
rear of the vehicle
to the right, look
back over your right
shoulder.
When turning the
rear of the vehicle to
the left, look back over
your left shoulder.
2. Continue to look o
ver your shoulder and trail
brake (do not accelerate using the gas pedal)
while moving at a walking pace.
3. Begin the turn when the center of the rear tire
is aligned with the curb or edge of the road.
•
•
360 degree search:
physically turn your head and
body to look all the way around
your vehicle.
Tra
il brake: a slight decrease
of pressure on the brake pedal.
Bli
nd spot: the area that is not
visible until you turn your head
and look.
Path
of travel: the area you
want the vehicle to go to.
Definitions
44
Backing into a Driveway
Signal once you’ve found a place to pull over.
Check your rearview mirror and bl
ind spot for traffic and
pedestrians.
Leave the traffic lane and stop within 18 inches of the curb.
Shift to “REVERSE” and complete a 3
6
0 degree search to
make sure it is all
clear.
Look over your shoulder and trai
l brake (do not accelerate
using the gas pedal) move at a walking pace.
Begin the turn when the center of the rear tire is aligned
with the curb.
Backing Out of a Driveway
1. With your right foot on the brake pedal, shift to “REVERSE.”
2. Do a 360 degree search to make sure it is all
clear.
3. Look over your shoulder and trail brake (do not accelerate
using the gas pedal) at a walking pace.
4. Stop short of y
our intended path of travel (for example,
before a sidewalk or the roadway). Stop before entering
the roadway and make sure you yield to all traffic and
pedestrians.
5. Do another 36
0 degree search and when clear, continue
to look over your shoulder and trai
l brake.
6. Begin the turn when you think the center of the rear tire is
aligned with the curb.
7. Complete the turn in the smallest amount of space
.
8. Step on the brake and shift to “DRIVE.”
•
•
•
•
•
•

45
Parking
Make sure your teen learns, practices,
and can demonstrate parking in different
situations.
Note: P
arking is ALWAYS prohibited in
the following situations:
In front of driveways
Within 15 feet of fire hydrants
In or near intersections
On a sidewalk or crosswalk
Within 30 feet of a traffic signal, stop
sign, or yield sign
Within 20 feet of a pedestrian safety zone
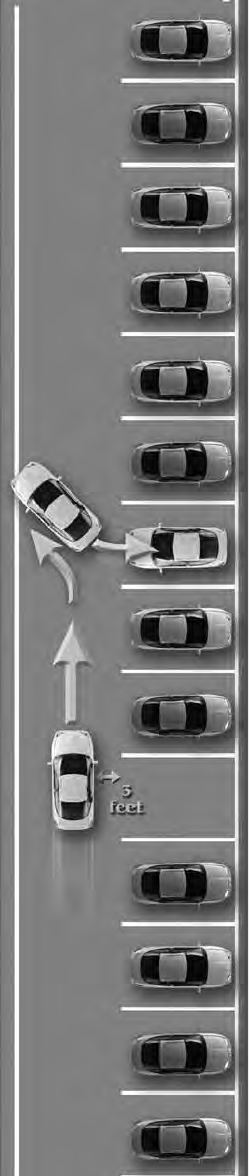
Entering Angle Parking
Common Errors When Entering Angle
Parking
Fails to signal
The vehicle is too close to parking space
on the side
Fails to see traffic in the rear
Speed is too fast
Fails to target to the center of space
Pr
oper Procedures for Entering Angle
Parking
1. Signal.
2. Slow or stop the vehicle at least 6-8 feet
from the parking space.
3. Check
your blind spot on the side of the
parking space for traffic and pedestrians.
4. Begin turning when y
ou can see the
center of the parking space without your
line of sight (or view) cutting across the
parking line.
•
•
•
•
•
•
•
•
•
•
•

46
5. Drive very slowly and turn the wheel
sharply toward the center of the
space.
6. Once you enter the space
, straighten
the wheels and center the vehicle in
the space.
7. St
op even with the curb or parking line.
8. Secure your vehicle.
Exiting Angle Parking
Common Errors When Exiting Angle
Parking
Fails to check rear
Fails to signal
Speed is too fast
Fails to look back while backing
Starts turning before bumper is
cleared
Pr
oper
Procedures for Exiting Angle
Parking
1. With your foot on the brake, shift to
“REVERSE.”
2. Do a 360 degree search and yield to
all tr
affic and pedestrians.
3. Look ov
er your shoulder and trail
brake (do not accelerate using the
gas pedal) at a walking pace.
4. Check y
our front for clearance.
5. Begin turning when your front bumper
is even with the rear bumper of the
parked vehicle to your left or when the
dash of your vehicle appears to clear
the vehicle to the side.
6. Continue to look to the rear while
bac
king into the nearest lane.
7. Stop smoothly and shift to “DRIVE.
”
•
•
•
•
•

47
Perpendicular Parking
Common High-Risk Errors
Fails to approach and align to space
correctly
Fails to search for, communicate with,
or yield to other traffic
Speed is too fast
Forgets to shift to “REVERSE”
Fails to straighten wheels and align in
middle of space
Pr
oper
Procedures for Perpendicular
Parking
Signal and get 6 to 8 feet from the
parked vehicles or as far to the left of
the lane as possible.
Check traffic behind you.
Drive very slowly and turn the wheel
sharp to the right of the space.
Check your right rear fender for
clearance.
Straighten the wheel when you are
centered in the space.
If necessary, shift to “REVERSE” and
creep back slightly turning the wheel to
the left.
Use a forward reference point to avoid
hitting a curb.
Cons
i
der Backing into the Space
It’s safer to drive out of a space
Requires less time and space
Better view when leaving the space
Avoids backing out into traffic
Others are more likely to let you out
•
•
•
•
•
•
•
•
•
•
•
•
•
•
•
•
•
48
Backing into Perpendicular
Parking Space
Common High-Risk Errors
Fails to approach and align to space
correctly
Fails to search for, communicate with,
or yield to other traffic
Speed is too fast when turning to a 45
degree angle or backing
Forgets to shift to ”REVERSE”
Fails to straighten wheels and align in
middle of space
Pr
oper
Procedures for Backing into
Perpendicular Parking
1. Signal to the right.
2. Slow the vehicle and approach the
space 3 feet from the parking space.
3. Stop when the driv
er’s body appears
to be aligned in the center of the
parking space.
4. Signal to the left and check f
or traffic
and pedestrians.
5. Driv
e very slowly and turn the wheel
fast to the left and move to a 45-
degree angle to the space.
6. Stop.
Shift to reverse.
7. Look over right shoulder to check
alignment into space.
8. Drive very slowly and turn the wheel
sharp toward the center of the
space.
9. Once you enter the space
, straighten
the wheels and center the vehicle in
the space.
10. Stop ev
en with the curb or parking
line.
•
•
•
•
•

49
Advantages of Backing into the Space
Requires less time and space.
Better line of sight while leaving the space.
Avoids backing out into traffic.
Others are more likely to let you out into
traffic flow.
Parallel Parking
Entering a Parallel Parking Space
1. Check the rearview mirror and signal.
2. Stop 2-3 feet beside the front vehicle and
line up rear bumpers.
3. Shift to “REVERSE.
”
4. Look over your shoulder and trail brake
(do not accelerate using the gas pedal) at a
walking pace.
5. Look back while inching bac
k and turn wheel
fully toward the curb.
6. W
hen the vehicle is 45 degrees to the curb,
and your front wheels align with the back
wheels of the other vehicle, straighten the tires
and slowly back up in a straight line.
7. Check the front of y
our vehicle to make sure
it clears.
8. When your left rear b
umper is even with the
rear vehicle left front bumper, turn wheels
sharply left and continue to inch back.
9. When parallel to the curb
, straighten wheels
and center your vehicle in the space.
Exiting a Parallel Parking Space
1. Reverse and inch back until you can see the
front vehicle’s rear tires.
2. Check y
our blind spot for pedestrians and
traffic.
•
•
•
•

50
3. Signal and yield to other traffic.
4. Search your intended path of travel and
enter the nearest travel lane when clear.
5. Cancel signal and check rear
view mirror.
Common Parallel Parking Errors
Approaches too close or too fast
Fails to shift to “REVERSE”
Fails to look back while moving back
Begins turning too early
Fails to check front swing for clearance
Parking on Hills
Common Errors for Parking on Hills
Fails to search for, communicate with, or yield
to other
traffic and pedestrians when entering or
exiting the roadway
Speed is too fast on approach
Fails to set parking brake when securing
the vehicle
Good Habits/Proper Procedures for
Parking on Hills
1. Choose a legal space and signal.
2. Check your review mirror and blind spot.
3. Apply the brak
e and approach parallel to
and 12 inches from the curb.
4. Ma
ke a smooth stop and shift to
“NEUTRAL.”.
•
•
•
•
•
•
•
•

51
5. Turn the wheels in the
proper direction.
If
facing uphill with
curb, turn wheels left,
toward the roadway
(Figure 1.)
If
facing downhill
with curb, turn wheel
right, away from the
roadway (Figure 2.)
If
there is no curb,
turn wheels right, away from the roadway (Figure 3.)
6. Secure vehicle b
y shifting to “PARK” and setting your
parking brake.
Turns
Make sure your teen practices and can demonstrate proper
right and left turns. As you practice:
Stop at intersections at the marked stop line. If there is no
line, then stop at the crosswalk. If there is no crosswalk,
then stop at the point nearest the intersecting roadway
where you have a view of approaching traffic.
Always look to the left, to the front, to the right, and then to
the left again before entering any intersection.
Make all turns from the nearest legal lane into the nearest
legal lane!
Right Turns With a Required Stop
Common Errors for Right Turns With a Required Stop
Stops over legal stop area
Fails to turn head before turning wheel
Turns wheel before starting forward motion
Turns into wrong lane
Travels in or cuts across the bike lane
Travels in on-street parking spaces
•
•
•
•
•
•
•
•
•
•
•
•
Trail brake: a slight decrease
of pressure on the brake pedal.
Bli
nd spot: the area that is not
visible until you turn your head
and look.
Path
of travel: the area you
want the vehicle to go to.
Definitions

52
Proper Procedures for Right Turns With a Required Stop
1. Signal, check mirrors and blind spot. Check the right blind
spot to move right and the left blind spot to move left.
2. Use controlled
braking and allow enough space on the
right to avoid hitting the curb when turning, about 3 feet
from the right edge of the roadway. Be careful not to drive
in parking spaces or bike lanes.
3. Stop and search the intersection for v
ehicles, pedestrians
and hazards.
4. Tur
n your head in the direction of the turn before turning
the wheel.
5. Use li
ght acceleration and begin to turn when the
dashboard is aligned with the curb.
6. Straighten and use
progressive acceleration to target
speed.
7. Check rear
view mirror.
Right Turns Without a Required Stop
Common Errors for Right Turns Without a Required Stop
Late or no signal use
Confusion of right-of-way,
fails to yield
Fails to search intersection in
all directions
Fails to search before turning
wheel
Turns into incorrect lane
Accelerates too early
•
•
•
•
•
•
Blind spot: the area that is not
visible until you turn your head
and look.
Controlled
brake: firm,
steady, even pressure on the
brake pedal.
Li
ght acceleration: light
pressure on the gas pedal.
Progress
ive acceleration:
a steady increase in pressure on
the gas pedal.
Tra
il brake: a slight decrease
of pressure on the brake pedal.
Definitions

53
Proper Procedures for Right
Turns Without a
Required Stop
1. Signal, check mirrors and blind
spot. Check the right blind spot
to move right.
2. Use controlled
braking in a
position about 3 feet from curb,
parked vehicle, parking space or
bike lane.
3. Search intersection in all
directions for vehicles,
pedestrians and hazards.
4. Tur
n your head in the direction
of the turn before turning the
wheel.
5. Begin the turn when the
dashboard is aligned with the
curb
.
6. Tra
il brake until halfway through
the turn.
7. Straighten and use
progressive
acceleration to target speed.
8. Check rear
view mirror.
54
Left Turns With a Required Stop
Common Errors for Left Turns With a Required Stop
Fails to make a complete stop
Stops over the legal stop point
Stops too close to the vehicle ahead
Fails to yield to pedestrians
Cuts across the center yellow line when turning left
Pr
oper
Procedures for Left Turns With a Required Stop
1. Use controlled braking and approach in Lane
Position 2.
2. Stop at the marked stop line, pedestrian crosswalk, or at
the point nearest the intersecting roadway where you have
a view of approaching traffic
3. Search the intersection for v
ehicles, pedestrians, and
hazards.
4. Tur
n your head in the direction of the turn before turning
the steering wheel.
5. Begin tur
n when y
our line of sight (or view) to the center of
your intended lane does not cut across the curb line.
6. Use li
ght acceleration while turning the steering wheel.
7. S
traighten and use progressive acceleration to target speed.
8. Check rear
view mirror.
Left Turns Without a Required Stop
Common Errors for Left Turns Without a Required Stop
Confusion of right-of-way
Late or no signal
Fails to check blind spot
Fails to search the intersection for traffic and pedestrians
Too much steering
Late steering recovery
Turns into an incorrect lane
Brakes too hard
Accelerates too soon or too much
•
•
•
•
•
•
•
•
•
•
•
•
•
•

55
Proper Procedures for
Left Turns Without a
Required Stop
1. Signal, check mirrors
and blind spot.
2. Use
controlled braking
and Lane
Position 2.
3. Search the intersection
for vehicles, pedestrians,
and hazards.
4. Tur
n your head in the
direction of the turn before
turning the wheel.
5. Begin turning when the
front b
umper is even with
the curb line.
6. Tur
n into the nearest legal
lane of travel.
7. Tra
il brake until halfway
through the turn.
8. Straighten and use
pr
ogressive acceleration
to reach the proper speed.
9. Check rear
view mirror.
Controlled brake: firm,
steady, even pressure on the
brake pedal.
Lane position 2: the left side
of the line.
Li
ght accelleration: light
pressure on the gas pedal.
Progress
ive acceleration:
a steady increase in pressure on
the gas pedal.
Bli
nd spot: the area that is not
visible until you turn your head
and look.
T
rail brake:
a slight decrease
of pressure on the brake pedal.
Definitions

56
Bicycles on the Roadway
Obey speed limits. Excessive speed is a factor in a
high number of collisions involving cyclists.
Be aware of how wide your vehicle is when passing a
cyclist. Don’t pass too close.
You may move your vehicle into a bike lane to make a
right turn if it is unoccupied. You may not use the bike
lane for a right turn if it is occupied by a bicyclist. It’s
illegal and may impede a cyclist. Remember, cyclists
cannot stop as fast as you can.
Cyclists can travel at high speeds, often as fast as
other traffic. Don’t assume there is more time to turn
in front of a cyclist than in front of a vehicle.
•
•
•
•

complex
driving skills
AFTER your teen masters starting and stopping the vehicle,
backing, parking, and turns, then practice more complex
driving skills. Make sure your teen learns, practices, and can
demonstrate advanced driving skills to your satisfaction.
Changing Lanes
Common Errors When Changing Lanes
Fails to check front, rear, and sides for a stable gap
Too little space or time to move into the new lane
Fails to signal
Steers too quickly, too much or not smooth and gradual
into the new lane
Needless slowing
Fails to cancel signal
Exceeds speed limit
Crosses multiple lanes
at one time
Drifts while checking
blind spot
Pr
oper Procedures for Changing Lanes
1. Check mirrors and to the front, rear, and
sides of your vehicle and the bl
ind
spot for a stable gap.
2. Signal and use the proper lane
position.
•
•
•
•
•
•
•
•
•
Blind spot: the area that is not
visible until you turn your head
and look.
Definition
57

3. Check your blind spot again.
4. Maintain your speed or increase speed if necessary —
Never slow unless you need to.
5. Move to the new lane purposefully and gradually at a slight
angle.
6. Adjust speed to surrounding traffic.
7. Cancel the tur
n signal.
8. Check the rearview mirror.
9. Create separation or “open space” to the front, rear, and
sides of your vehicle.
Passing
Common Errors When
Passing
Not looking ahead for a
clear path
Fails to signal
Accelerates too soon
Tailgates a vehicle before
passing it
Drives too slow while
passing
Steers too quickly or too
much into the passing lane
Returns to the lane too soon
Fails to cancel the signal
Exceeds the speed limit
Passes needlessly
Passes in a no-passing zone
•
•
•
•
•
•
•
•
•
•
•
Blind spot: the area that is not
visible until you turn your head
and look.
Path
of travel: the area you
want the vehicle to go to.
Path
of travel obstacles:
anything that interferes with your
vehicle going where you want it to
go. Examples include stop signs,
speed bumps, yield signs, red or
yellow traffic lights, pedestrians,
motorcycles, bicycles, animals,
and vehicles to the front, rear,
and side.
Definitions
58

Proper Procedures for Passing
1. First, ask yourself if passing at the
time is necessary, legal, and safe.
2. Search your intended
path of travel
far ahead for any obstacles.
3. Check mirrors and
blind spot.
4. Signal in the direction of the pass.
5. Increase speed to at least 10 mph
f
aster than the vehicle you are
passing, but stay within the legal
speed limit.
6. Mo
v
e smoothly into the passing lane.
7. Change your signal to the opposite
direction.
8. Check the
blind spot.
9. Return to the lane when y
ou can
see the headlights of the vehicle you
passed in your rearview mirror.
10. Cancel signal and resume a safe and
legal speed.
11. Check the rear
view mirror.
59

Entering the Freeway
Common Errors When
Entering the Freeway
Drives too slow
Fails to signal
Fails to yield to other vehicles
already on the freeway
Fails to check traffic to the front
and rear
Drifts while checking traffic
Poor gap judgment
Turns the steering wheel too
sharply
Fails to cancel the turn signal
Proper Procedures
for
Acceleration Lane
1. Check all mirrors.
2. Keep 4+ seconds of space to
the front of you.
3. Accelerate smoothly and
br
iskly to match traffic flow.
Proper
Procedures for Merging
4. Communicate your intentions
with signals and lane position.
5. Check the front and rear
, and
the blind spot for a stable
gap in tr
affic in your intended
path
of travel.
6. Merge smoothly into the gap
in traffic.
7. Adjust speed to surrounding
traffic.
8. Cancel the tur
n signal.
9. Check the rearview mirror.
10. Create separation or “open
space” to the front, rear, and
sides of your vehicle.
•
•
•
•
•
•
•
•
60

Exiting the Freeway
Common Errors When
Exiting the Freeway
Fails to see the exit ramp in
advance
Reduces speed before the exit
ramp
Fails to signal
Fails to check the rearview mirror
Fails to reduce speed on the exit
ramp
Fails to cancel the turn signal
Cuts over from left lane at the last
minute
Pr
oper Procedures for
Exi
ting the Freeway
1. Plan for the exit – read the signs.
2. Move to the proper lane well in
advance.
3. Signal, and check the rear
view
mirror.
4. Maintain speed until you enter
the e
xit lane.
5. Enter the exit r
amp and use
controlled braking
. Reduce
speed to posted speed or less.
6. Adjust your speed and lane
position.
Prepare to stop or turn.
7. Check the ear
view mirror.
Note: Adjust procedures for the
following:
Traffic stopped on the exit ramp
Short deceleration lane
Very slow ramp speed
Other drivers following you at
high speed or close distance
•
•
•
•
•
•
•
•
•
•
•
61

Railroad Grade Crossings
Common Errors at Railroad Crossings
Does not take railroad crossing seriously
Fails to look
and listen for oncoming trains
Fails to ensure all tracks are clear
Stops too close to the tracks
Races to beat crossing arms when the lights flash
Pr
oper
Procedures for Railroad Crossing
1. Slow down, whether the lights are blinking or not, and
check the rearview mirror for traffic behind you.
2. Look
and listen for oncoming trains.
3. Check the n
umber of tracks and look down each track in
both directions.
•
•
•
•
•
62

4. If a train is coming or the crossing lights are blinking, stop
at least 15 feet from the tracks or at the stop line.
5. When the trac
ks are clear as far as you can see in both
directions, cross the tracks.
6. When you cross r
ailroad tracks, make sure you can cross
without having to stop on the tracks.
School Zones
Be alert at all times for children and pedestrians in school
zones.
Follow the signs or flashing lights that warn you that you
are approaching a school or school crossing.
Obey the slower speed limits.
Signs may be posted telling drivers that traffic fines are
higher in school zones.
•
•
•
•
63
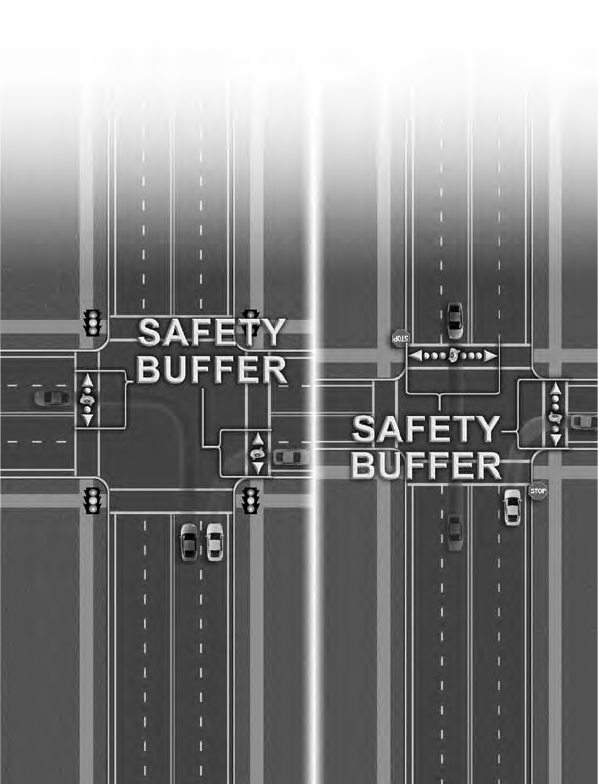
Crosswalks
Pedestrians and bicyclists have the right-of-way at crosswalks
and intersections, whether the crosswalk is marked or not.
Vehicles approaching an intersection must stop when a
pedestrian or bicyclist is in their half of the roadway. Vehicles
turning into an intersection must stop if a pedestrian or
bicyclist is within one lane of their half of the roadway. Once
the pedestrian or bicyclist is beyond one lane of their half of
the roadway, the vehicle may go.
64
Night Driving
Preparation
Give your teen planned and practical night-driving experience. Set
time when you will both be free from other obligations. Create a
relaxed atmosphere. Select a local route that your teen has driven
on before. Keep in mind the topics you need to cover.
Ni
ght Driving and Headlights
Switch to low beams when approaching another vehicle. If
the other driver fails to switch to low beam, slow and move to
lane position 3. Don’t look directly into the headlights; look to
the right edge of the road until the vehicle passes.
You need 2-4 seconds to stop. If you can’t see beyond your
vehicle’s headlights within this range, slow down. You may be
“driving blind.”
Hi
gh beam headlights in good condition illuminate about
350 feet.
Low
beam headlights in good condition illuminate about 182
feet.
If you travel at 50 mph with low beam headlights, you can
see about 2-1/2 seconds of lit roadway (182 feet) and you
need a total of 190 feet to stop your vehicle.
If you travel at 30 mph, you can see a little more than 4
seconds ahead with low beam headlights and 8 seconds
ahead with high beam headlights.
If you travel at 60 mph with high beam headlights, you can
see only 4 seconds ahead.
To gather critical information you need to see 12 to 15
seconds ahead. Look well beyond the headlights in lit
areas. In rural areas, choose speeds that give you the best
chance to get the information you need to make critical
decisions.
•
•
•
•
65

Skid Recovery
Skidding can happen at any time, on any surface, while
braking, accelerating, or steering. You are no longer
supposed to steer in the direction of the skid. Instead, steer
toward the path
of travel. This will allow you to focus on the
front of your vehicle and the path that you want to travel.
Proper
Procedures for Skid Recovery
1. As you drive, always focus on the path of travel.
2. The instant you detect the v
ehicle skid, turn the steering
wheel back toward the path
of travel.
Note: It is important to get the vehicle back on the path
of
travel before it gets 15 to 25 degrees off. That is your point
of no return. Once the skid reaches that angle, the vehicle is
going to keep going in the direction of the skid.
Don’t
give up – stay off the pedals, keep your eyes on the
target, and keep working to get the vehicle under control.
Driving in Bad Weather
Drive slower than you would in good weather
Leave more space between your vehicle and those ahead
Drive with your headlights on
Don’t use cruise control
Check weather conditions on your travel route. Use the
Department of Transportation website www.wsdot.wa.gov.
Be sure to carry chains or have traction tires on your vehicle.
•
•
•
•
66

emergencies
— How to handle them
Vehicle Malfunctions
Hood Flies Up
1. Look
through the space at the bottom of your windshield
to keep an open line of sight.
2. Steer
to the side of the road.
3. Secure
the hood.
Engine Fails
This could happen when the engine quits running completely,
becomes flooded, overheats, or is simply out of gas. In the event
of an engine failure:
1. Stay off the brake – you may need the momentum to pull
off the road – steer firmly.
2. K
eep eyes on open target area.
3.
Use
an open palm to shift to neutral and attempt to restart
– if that fails take an open escape path.
4. Turn off the ignition.
Accelerator
Sticks
This could be caused by a broken spring, or the pedal being
stuck in the down position. In either case:
1. Shi
ft to neutral – use an open palm.
2. Search for an escape path.
3. Steer smoothly.
4. Brake gently.
5. Pull off the roadway.
6. Turn off the ignition.
67
Brakes Fail
A brake failure can be a complete loss of brakes or only the
loss of power brake. If the brakes quit working:
1. Keep
your eyes on the target area.
2. Control the steering.
3. Rapidly pump the brakes.
4. Shift to a lower gear.
5. Use the parking brake to slow or stop.
6. Find a soft collision area
if necessary.
Ti
re Blow Out
Blowouts can cause serious damage to vehicles and injury or
death to occupants.
1. Ai
m to the target area – where you want the car to go.
2. Reduce speed gradually
:
Maintain balance
Stay off the brake
3. Control
the steering.
4. Find a safe place to pull off the road.
Engine Fire
If the vehicle catches on fire:
1. Steer
out of traffic and away from buildings and
people.
2. Have
everyone leave the vehicle immediately and move
away.
3. Do
not open the hood.
•
•
68
If You Have a Collision
1. Stop immediately. Do not leave your vehicle where it can
block traffic unless it’s so damaged it can’t be moved.
2. Turn
off the ignition to avoid the possibility of a fire.
3. Ai
d the injured and give first aid if necessary. Never move
an injured person unless there is danger of fire or another
collision.
4. Prevent
further damage by warning oncoming traffic
with flares or reflectors.
5. If i
t is an emergency, call 911.
6. Exchange information.
Be sure to get:
Names and addresses
Driver license numbers
License plate numbers
An insurance company name, address, telephone
number, and policy number
7. Note
the names of passengers and their positions in
the car.
8. Record the names and addresses of witnesses.
9. File a collision report
when necessary. Washington
requires a collision report be filed with the Washington
State Patrol when:
Damage to any vehicle is over $700 as a result of
damages from this collision.
Injury or death results from the collision.
Damage to any person’s property, other than a vehicle
involved in the collision, is over $700.
•
•
•
•
•
•
•
69
If You’re Stopped by Law Enforcement
1. Be prepared to show your:
Driver license
Vehicle registration
Proof of insurance
2. W
a
it for the officer to ask you for these documents before
you reach for them.
3. Tell
the officer where you will get the items from:
“My registration is in the glove box, may I get it now?”
•
•
•
70

71
what happens
if your teen messes up?
What Happens Until Age 18?
Until then:
For the first violation – a warning letter is sent to the parent
or guardian
For a second violation – your teen’s license will be
suspended for six months (or until age 18 if that comes
first), and the parent or guardian receives a copy of the
suspension
For a third violation – your teen’s license will be suspended
until age 18 and the parent or guardian receives a copy of
the suspension.
Any amount of alcohol in the blood is considered Driving
Under the Influence (DUI).If your teen is arrested for DUI
and:
F
a
ils a breath test – Your teen’s license will be revoked
for one year or until age 21, whichever is longer. If there
has been a prior alcohol-related offense within the last
seven years, the license will be revoked for two years.
Refuses
to take a breath test – Your teen’s license will
be revoked for one year.
Tough Penalties for First-Year Convictions
During the first year, with an intermediate license, if your teen
commits any traffic violation or is in a collision, the passenger
and nighttime restrictions will continue until age 18.
•
•
•
•
•
•

72
the rules
for intermediate licenses
What is Needed to Qualify for a License
To get a license your teen must:
Have an instruction permit for at least six months.
Complete an approved traffic safety education course and
at least 50 hours of supervised driving practice, and 10 of
these hours must happen at night.
The super
vising dr
iver must be someone who is at least 21
years old and has had a valid driver license for at least five
years.
After Your Teen Gets a License
Here are driving restrictions:
For the first six m
onths, your teen can’t drive with
people under the age of 20 unless they are a member of
your immediate family. This means no friends.
For the second six m
onths, your teen can’t drive with
more than three people under the age of 20 unless they are
members of your immediate family.
For the first year,
your teen cannot drive between 1 am
and 5 a.m.
The above restrictions will end on ______________.
If these rules are not followed, your teen could get a ticket
and pay fines or have the license suspended and your
insurance rates could go up. Driving comes with responsibility.
Remember, driving is a privilege – not a right.
•
•
•
•
•

S
Parent and Teen Safe-Driving Agreement
We, the parent(s) or guardian(s) and the teen driver agree:
The teen driver will: (check all that apply)
drive safely and obey all traffic laws.
not operate any vehicle while under the influence of alcohol
or drugs.
ensure everyone in the vehicle wears a seat belt.
follow all intermediate license restrictions.
not send or read text messages or talk on a cell phone
while driving.
share driving plans – destination and times.
call if expecting to be more than 30 minutes late.
not drive after 10 p.m. unless given permission.
not consume alcohol or drugs.
not ride with a driver who is under the influence of alcohol
or drugs and will seek other transportation or call a parent
or guardian at any hour from any place for a safe ride.
not let anyone else use the vehicle.
be allowed to use the vehicle based on the following
grades earned at school:
______________________________________________
______________________________________________
Safe-driving
agreement
73

The parent(s) or guardian(s) will: (check all that apply)
drive safely and obey all traffic laws.
not operate any vehicle while under the influence of alcohol
or drugs.
track the teen driver’s behind-the-wheel practice and
progress using a practice driving log.
listen to the teen driver’s explanations or concerns
regarding the vehicle or the terms of the agreement.
provide respectful feedback when accompanying the teen
driver in a motor vehicle.
serve as a good role model when operating a vehicle.
coach good driving skills and habits to the teen driver.
not ride with a driver who is under the influence of alcohol
or drugs, and will seek other transportation as needed.
take the teen driver home at any hour from any place,
without conflict or question at that time, though a
discussion of the event would happen later.
If the teen driver violates this agreement or commits one
of the following traffic offenses vehicle privileges will be
lost for the following number of days: (fill in days for each)
_____ First offense
_____ Preventable collision
_____ Second offense
_____ Serious traffic violation
_____ Third offense
_____ Drug or alcohol offense
Other conditions or responsibilities agreed to:
________________________________________________
________________________________________________
________________________________________________
________________________________________________
________________________________________________
We will review this agreement on _____________________ .
Teen driver signature Date
Parent/Guardian signature Date
Parent/Guardian signature Date
Date
X
X
X
74

The Washington
Parent Guide
to Teen Driving
This guide supports the important partnerships
between state driver licensing, driver education,
teen drivers, and their parents. It is our hope that
this information will help you to help your teen
become a safe and responsible driver.
N/6/07 100M
